Storytime folks…
Since I was 11 years old, I’ve wanted a MKIV Supra. They had always been too expensive in the United States, and as a basic rule of economics – I knew if supply increased (and demand didn’t outpace that supply) I should be able to purchase an imported Supra for less than a US Market Supra
I was half right, as the demand of folks who actually had the money ready to purchase wasn’t as high as the available cars – but people had also started to buy cars and treat them as ‘stocks’, rather than something they wanted drive, wrench on, and simply enjoy as a piece of automotive history. This market inflation caused the price of the JDM Supra’s to increase, and led to me researching, purchasing, exporting, and importing a JDM supra myself.
Below is a guide to importing a 25 year old car from an auction house in Japan to the United States, with every resource you would need to do so.
*This guide is going to assume you are going to use Japan Car Direct, but you could also use it with a reputable dealer.
Step 1 – Research
Resources:
- How to Read an Auction Sheet
- Cost Breakdown Spreadsheet
- Limited JCD Auction Site / Full Auction Site (May need Japan Car Direct access – register here.)
- Power of Attorney
- This isn’t Great World’s Exact Power of Attorney, but should give you an idea of what you’re signing.
- TWIC Card
There are two main items you are going to want to research: the Vehicle (with the market around it) and the People you are going to use to import the vehicle.
I. The Vehicle
When it comes to importing a vehicle, you are going to want to research information around the specific vehicle:
- What is the cost of the vehicle in the United States?
- Is it worth spending your time and money to import, or can you get a cheap clean example where somebody else already took the risk?
- What is the Japanese market for the vehicle?
- How often do these vehicles come up for auction?
- Are you willing to wait as long as it may tae to find a clean car?
- What does a rougher example (Grade 2/3) sell for?
- What does a clean example (Grade 4/5) sell for?
- Which grade of car isn’t selling at all?
- Are you willing to take that risk to get your hands on anything? (I wouldn’t recommend it)
- Does the cost for a clean example fit your budget?
- How often do these vehicles come up for auction?
Keep an eye on the Japanese auctions and United States sale forums to form an idea of a United States market and Japanese Market cost and use that to determine if importing a car (and the cost/risk associated with it) is right for you. I personally did about 6 months of analysis before bidding on a single car.
II. The People Involved
You are going to want to research anybody you plan to use during your purchase, export, and import processes. You likely won’t be able to engage with someone as involved as towing from the auction house to port, or someone on the shipping boat – so having someone you trust to engage those contacts is key.
- The Exporter / Dealer is a key person to have an idea of experience and contact. I used Japan Car Direct, and have only fantastic things to say.
- What is their reputation? Do as much online research as possible.
- Are they readily available?
- Have the purchased a car at auction before?
- Have they exported a vehicle from Japan before?
- Have they booked a RoRo shipping vessel before?
- The Importer is the other key person who will help you get the car into the United States, and you need to make sure you have someone who is experienced and readily available. I used Henry Mak from Great World.
- What is their reputation? Do as much online research as possible.
- Are they readily available?
- Do they have a phone number in case of emergency importing the vehicle?
- Do you they seem reliable?
Once you pick an Importer, they may ask you to start giving them a rough outline of the cost of the car and ask you to assign Power of Attorney so they can file paperwork on your behalf. There is an example of Great World’s Power of Attorney above.
A Power of Attorney (POA) is a legal document that gives someone the authority to act on behalf of another person, known as the principal.
A Power of Attorney seems daunting, but if it is with a reputable company – you have nothing to worry about. I can vouch for Henry at Great-World, and your exporter should also have Import Resources you can trust.
III. Optional Research – TWIC Card Application
If you plan on retrieving the car from a Port yourself, getting a TWIC Card is a good idea.
The Transportation Worker Identification Credential (TWIC), is required by the Maritime Transportation Security Act for workers who need access to secure areas of the nation’s maritime facilities and vessels
You can pay a Port Escort to let one person onto a port to retrieve a vehicle, but you are at the mercy of their schedule for the day. In one instance, I waited with a freind for several hours – then the friend had to load the car by themselves. With a TWIC Card, you can access the car on port.
This isn’t a must have – but came up in my research and the application is straight forward. You also get free Travel Pre-Check with a TWIC card, so there are some outside benefits.
Step 2 – Bidding
Resources: Wire Form
You’re ready to bid? Great! Since you have registered with JCD at Step 1 – Reach out to your contact and ask about the vehicle. They will record a video of a transaction of the auction sheet, an overview of the pictures, and step through what their impressions of the vehicle are.
You can pay to have 6 additional pictures of the car taken for 4,000 Yen (around 30 dollars.) They won’t be able to get under the vehicles, but if you have exterior areas you are worried about, this is a great way to check those areas out.
When you’re deciding which cars to bid on, keep in mind the grading system can be a somewhat subjective. I’ve seen some rough Grade 4 cars and some really clean Grade 3 cars. It may also make sense to look at ‘R’ cars, which have a repair on their history. It is not the same as a rebuilt title cars in America – the Auction House is just stating that they are aware of an insurance laim made against the c ar.
With Japan Car Direct, you wire 8% of your maximum bid to start bidding on vehicles. Use the Wire Form above fill out the necessary fields to wire money. In the example case of a $100,000 R34 Skyline GT-R, you would wire $8,000 for your maximum bid.
How to Fill out the Wire Form
This is the most simple form I could create that had all of the detail I needed to do a wire.
Beneficiary to Transfer Information – This is reference info for you and the bank
Beneficiary Transfer To Name – The Bank’s Name you are Wiring To
Beneficiary Transfer To Address – The Bank’s Address you are Wiring To
Beneficiary Transfer To Phone Number – The Bank’s Phone Number you are Wiring To
Wire Information
Bank Name – The Bank’s name you are wiring to, should match ‘Beneficiary Transfer To Name’ above.
Account Holder – This is the company you are paying. For example ‘Japan Car Direct’
Routing Number – This is the routing number of this bank for the transfer. It is no different than a routing/ABA number on the bottom of a common check.
Account Type – In my experieince ‘Commercial Checking’
Account Number – Provided by the company you are paying. No different that a checking number on the bottom of a common check.
Address – This is the account holder/company’s corporate address that they opened the account with. They will provide you with this.
Reference – This was always an invoice number, and that is for internal accounting folks to clear your account without you having to ask.
Wiring money is a little uncomfortable the first time you do it, but after doing it to a few different times, you and your bank tellers will get used to it. I would advise asking for an experienced teller at your bank. They can also trace failed wires, as I had one rejected due to a typo on my form.
The maximum bid is not necessarily what you’ll pay for the car, and if you win for less – JCD will apply the amount to the total of the vehicle. Bidding is digital, and it happens quickly. JCD will set your maximum bid, other bids will come in, and if you win, you’ll receive a confirmation e-mail with the details!
Step 3 – Winning
As mentioned above, bidding goes fast and you may win for less than your maximum bid. I happened to win my Supra for $5,000 less than I had put in as my maximum.
Technically, Japan Car Direct is purchasing the car. They will notify you of the win, and you will be responsible for paying them cost of the car, along with their fees and some miscellaneous fees:
- Cost of Vehicle Won at Auction
- JCD’s 4% Fee (well worth it for the auction, export, and shipping experience)
- In the case of the $100,000 R34 GTR – $4,000
- Inland Transport
- You need to transport your car out of the auction house’s lots and into a RoRo port.
- Export Filing Charges
- Charges to file your Export Certificate and get a Certified English Translated Version (for US Import/Registration)
- RoRo (‘Roll on Roll off‘) Shipping Cost
There are other fees that you may be charged (such as to wash the car, lengthy storage, etc.) that are in the cost spreadsheet from Step 1. You will need to wire the money within 48 hours. Use the Wire Form from Step 2.
The Export Certificate is essentially the Japan export form of what is a ‘Title’ in the United States. Your Exporter will get you the Export Certificate, along with a Certified English Translation of the Export Certificate.
You should notify the importer you picked in Step 1 that you have won the vehicle so you can get your paperwork started. We will talk about the Export, Shipping, and Import paperwork in the next steps.
Step 4 – Exporting and Shipping
Resources:
- Draft Bill of Lading
- Commercial Invoice (Bill of Sale)
- ISF 10+2 Form
- MarineTraffic Monitoring Application
Your Exporter (in this case Japan Car Direct), will arrange the Shipping and Export paperwork. JCD was worth every penny and did a great job of this.
The concept of Roll on Roll off (RoRo) shipping is very common in the Automotive industry, and is likely how your car will be shipped.
Roll on Roll off (RoRo) shipping is a safe and reliable way of transporting vehicles, trucks, buses, rolling machinery, etc. overseas. Unlike container shipping, RoRo vessels are designed to accommodate cars and rolling cargo by allowing them to be driven or towed on and off the ship.
In the case of a very rare car (or a very wealthy person), a shipping container can also be arranged to prevent any accidental damage. RoRo is a very common shipping method, so much so that many ports all over the world are designed to handle this exact type of shipping.
It took a few days for my car to be towed from the auction shop to the nearest RoRo specific port. Japan Car Direct had a resource (included with the tow to the yard) provide pictures of the car in port, which proved that the car was moved from auction without damage.
The car will then sit at port for 4-12 weeks (depending on ships, how many cars are ready to be shipped, etc.) waiting for a RoRo ship to arrive and the car to be loaded. You will now fill out your shipping paperwork.
This is the first time you will file important paperwork. You will need to acquire a Draft Bill of Lading (with Bill of Lading Number) and a Commercial Invoice from your Exporter and provide them to your Importer so your import can file an ISF 10+2 Form with the United States.
This sounds a bit complex, but it doesn’t need to be. In short: You are turning your Draft Bill of Lading (BoL) and Commercial Invoice (think of it as a bill of sale, it’s exactly what it is) into a form the United States needs for incoming shipped goods. Below are definitions of each piece.
A Bill of Lading is a detailed list used in the shipment of goods in the form of a receipt given by the carrier to the person signing for the goods. The draft
A Commercial Invoice a commercial receipt for a bill of goods.
An Importer Security Filing (ISF), also known as “10+2”, is a requirement for importers to submit information to the US Customs and Border Protection (CBP) before ocean cargo is imported into the United States.
Once the ISF has been filed, make sure to ask your Importer for a copy – mine was not provided to me even though it was filed. A bit of a ‘catch 22’ here, your ISF needs to be filed before your cargo is loaded onto the ship or you risk a $10,000 fine.
JCD could not get me a Draft Bill of Lading until the car was loaded onto the ship, so I had to risk this fine. JCD assured me that they export thousands of cars a year and no one had been fined – and they were correct, I was not fined.
When your car is physically on the ship, your official Bill of Lading will be provided to the Exporter. Please ask your Exporter that the Bill of Lading is ‘digitally’ or ‘telex’ surrendered with your importer and yourself as notifiers on the Bill of Lading. This means that you do not have to be present at customs when your vehicle comes in, as it has been digitally surrendered – but you will be notified with an arrival notice as the car comes through customs.
The Surrender Bill of Lading speeds up the cargo release process at the destination port. Without the necessity for an original bill to claim ownership, importers can access their shipped goods more rapidly.
Finally, the car is on it’s way to you! How exciting! There is a fantastic mobile application and website called ‘MarineTraffic‘. You can track your boats every move. There is a slight ‘premium’ fee, but it was worth every penny.
Here are some pictures of my Supra as it came east to Hawaii, through the Panama Canal, and it’s first stop in the United States.
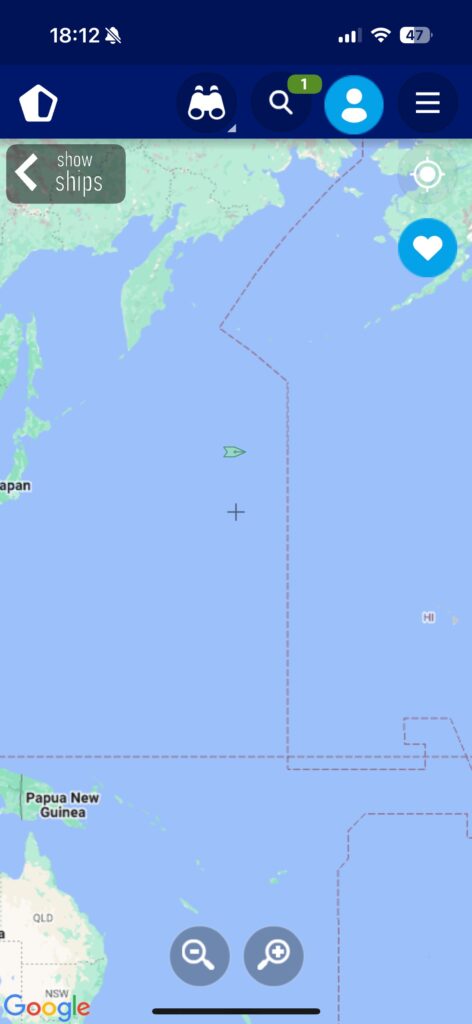
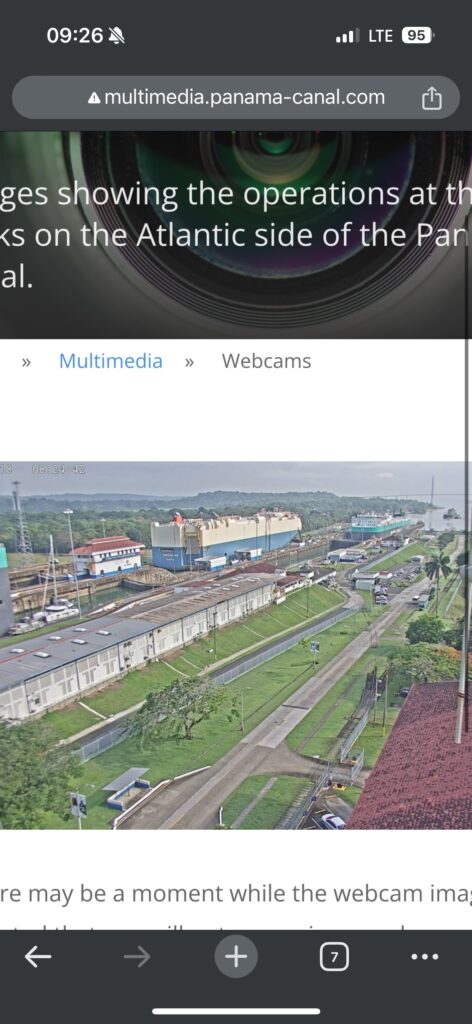
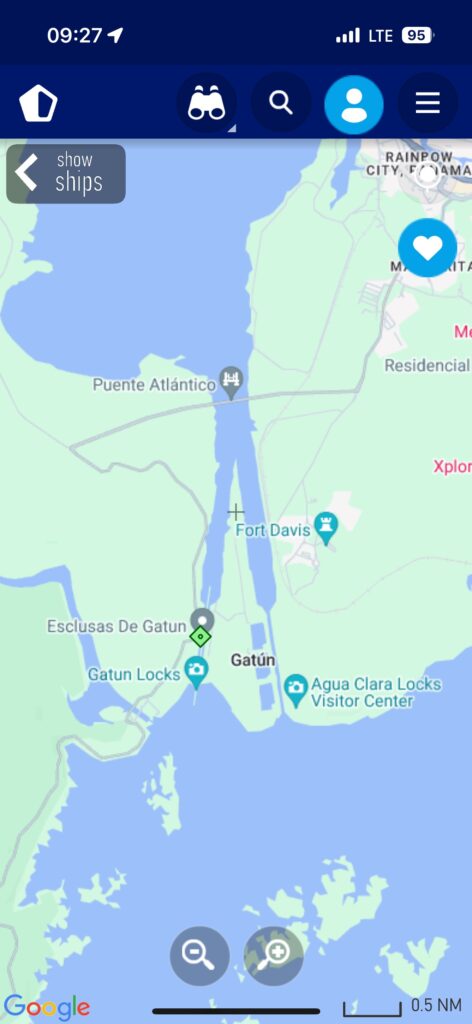
Watching your vehicle being shipped is both exciting and maddening as it typically takes 4-6 weeks to arrive (depending on marine traffic, port leaving, port arriving, etc.) Also note that your Bill of Lading includes a basic form of insurance – in case the boat sinks.
Step 5 – Importing
Resources:
- EPA Form 3520-1
- DOT Form HS-7
- JCD – Production Month Calculator
- Customs Bond
- This will be different per company/importer
Most of the Import Paperwork can be done in the 4-12 weeks you are waiting for your car to be booked onto a RoRo Ship. I started this paperwork as I talked to the Importer in Step 1 as I knew roughly the car I wanted, but could not complete the paperwork until the car was purchased. The Import Paperwork is VIN Specific, and will need to wait for your purchase to be secured.
An importer cost a $100 one time setup fee, plus $95 each time you need to clear customs. Every other fee is a form/bond fee you would have to pay the United States. This was worth every penny.
I. Import Form – EPA Form 3520-1
The EPA Form 3520-1 must be submitted to the U.S. Customs and Border Protection to import passenger vehicles, highway motorcycles and the corresponding engines into the United States.
You will need to complete the EPA 3520-1 form and provide it to your importer, who will file it with the United States as you import the vehicle through customs. This form lets the United States Customs and Border control know you plan to import a car – and that the car is exempt due to age. You will also present this form as you ‘receive’ the vehicle at port, and when you register it.
To check the cars manufacture date, use the JCD – Production Month Calculator to decode the VIN to production Month and Year above.
How to Fill out EPA Form 3520-1
Leave the following blank for your Importer to fill out before they file the form. The importer is inexpensive, and they will ensure this data is correct and more importantly have contact in the ports/government to file these forms!
Box 1 – Port code – Leave Blank
Box 2 – Entry Date – Leave Blank
Box 3 – Customs entry No – Leave Blank
Box 8 – ICI Imports – Leave Blank
Box 9 – EPA Exemption – Leave Blank
You must fill in the following fields:
Box 4 – VIN – Cars VIN
Box 5 – Manufacture Date – Decoded Manufacture Month and Year
Box 6 – Manufacture (Make) – Make of vehicle
Box 7 – Model – Vehicle Model
Box 10 – Name of importer / Importer’s address – Your own name and address (not JCD)
Box 11 – Name of owner / owner address – Your own name and address (not JCD)
Box 12 – Storage contact – Your own name and address (not JCD)
Box 13 – Signature – Use Digisign for your signiature
Box 14 – Date Signed – The date you sign
Box 15 – Name, company and phone – Your own name, phone and address (not JCD)
Box for Code E – Check this box as your are importing an older vehicle.
That is everything for the EPA Form – Not too bad! If you did this all the time to the same port, and had unchanging port contacts – you might be able to get away with not using an importer. They are inexpensive, and incredibly valuable in getting this forms filed when and where they need to be.
II. Import Form – DOT Form HS-7
Importers of motor vehicles must file form the DOT Form HS-7 at the time of vehicle is imported to declare whether the vehicle complies with DOT requirements.
You will need to complete the DOT Form HS-7 and provide it to your importer, who will file it with the United States as you import the vehicle through customs. This form lets the DOT know you plan to import a car, and it is safe (or in our case, 25+ years old. You will also present this form as you ‘receive’ the vehicle at port, and when you register it.
How to Fill out DOT Form HS-7
Leave the following blank for your Importer to fill out before they file the form. The importer is inexpensive, and they will ensure this data is correct and more importantly have contact in the ports/government to file these forms!
Port of Entry – Leave Blank
Customs Port Code – Leave Blank
Customs Entry No – Leave Blank
Entry Date – Leave Blank
NHTSA – Leave Blank
Vehicle Eligibility No – Leave Blank
Description of Merchandise if Motor Vehicle Equipment – Leave Blank
You must fill in the following fields:
At the top of the form…
Make of vehicle – Make
Model – Model
Year – Year
Vehicle Identification Number (VIN) – Vehicle VIN (leave blanks as this isn’t a 17 digit VIN)
Check box 1 and Indicate Date of Manufacture from Decoded VIN
At the bottom of the form…
Name of Importer – Your name
Name of Declarant – Your name
Declarant’s Capacity – Use the term ‘Owner’
Importers Address – Your address (not JCD)
Declarant Address – Your address (not JCD)
Declarant’s Signature – Digisign
Date Signed – The date you signed
That is everything for the DOT Form – Not too bad! I think you would have to be a registered importer to do a lot of this work – so again, I think the Importer is worth every penny.
III. Customs Bond
You will need to acquire a Customs Bond for your incoming vehicle.
A customs bond is a legal contract that ensures importers pay all taxes, fees, and duties when importing goods into the United States. It’s a type of surety bond that involves three parties:
The customs bond is $3 per $1000 spent, or $275 for a year. For a relatively expensive car or repeated purchase, you should purchase a year bond – as I did. This is a straightforward form and can be found above (this is specific to great world.)
This is all of the paperwork you can do until the car arrives at the destination port and you receive an Arrival Notice!
Step 6 – Release and Receive
Resources:
I. Release
Thought you were done with paperwork? Nope, still more to go! When your car is getting close to it’s destination port (where you are picking it up), you and your Importer will receive your Arrival Notice faxed off of the boat.
An Arrival Notice is a document issued out by a cargo carrier that lets all specificed parties know when a shipment will arrive at a destination.
The Arrival Notice will also come with directions on how to pay any filing/handling fees associated with your cargo. Norton Lilly Company handled my cargo, and required a $50 fee which you need to wire (see wire directions above.) They did not notify the Port that they were paid, so I had to call both the Norton Lilly and the Port to allow the release of my vehicle. My Importer assisted with this issue.
Always call your port and confirm that your cargo has been released.
After this, pay your Port any fees ahead of time (yes, they require adminstrative fees as well.) I would write up more on how to do this, but every Port is different. The Port America – FAPS Berth that my Supra was delivered to required you pay online and bring in printed receipts.
Your Importer will send you your final import invoice, where you will pay for the EPA Filing, DOT Filing, and 2.5% Customs Fee (this is customs charging you, not your Importer.)
Your Importer will then provide you with an Import Forms packet to print and bring to the port. It has a copy of every form you’ve filed so far with all Port Information filled in, with the additional final piece of paperwork – Your Entry Summary Declaration.
An Entry Summary Declaration (ENS) is a document that must be submitted to customs when goods are transported into a country’s customs territory. The declaration helps customs authorities assess the risk of the goods for security and safety reasons.
Your Exporter will mail insured documents to you, including your original Export Certificate, Certified English Translation, Original Commercial Invoice, and Original Bill of Lading. Bring these to port.
II. Receive
With every piece of Import and Export paperwork I had ever been issued, I went to Port America FAPS Berth. This process is going to be very different for every person, depending on what port you ship to and what equipment you already have. I’ll talk through my experience and my advice.
My Experience – I rented a 15′ Uhaul (seats 3) and Uhaul Car Trailer, and brought two friends. The drive from my area wasn’t bad, as I’ve towed boats from Long Island and dealt with bad NYC traffic – but folks should take their time and be careful.
The Port America FAPS Berth in Newark NJ where the Supra was delivered to is a really tough place to get any cargo from. Two hours early was two hours too late, and we barely made it out before their mandatory two hour lunch break at 1PM.
The port actually kicked us out into the road (which was constantly running huge container trucks) to load up our vehicle. This is not normal, and is absolutely illegal. Doing this previously with a friend, the Dundalk Port in Baltimore had you load inside the port.
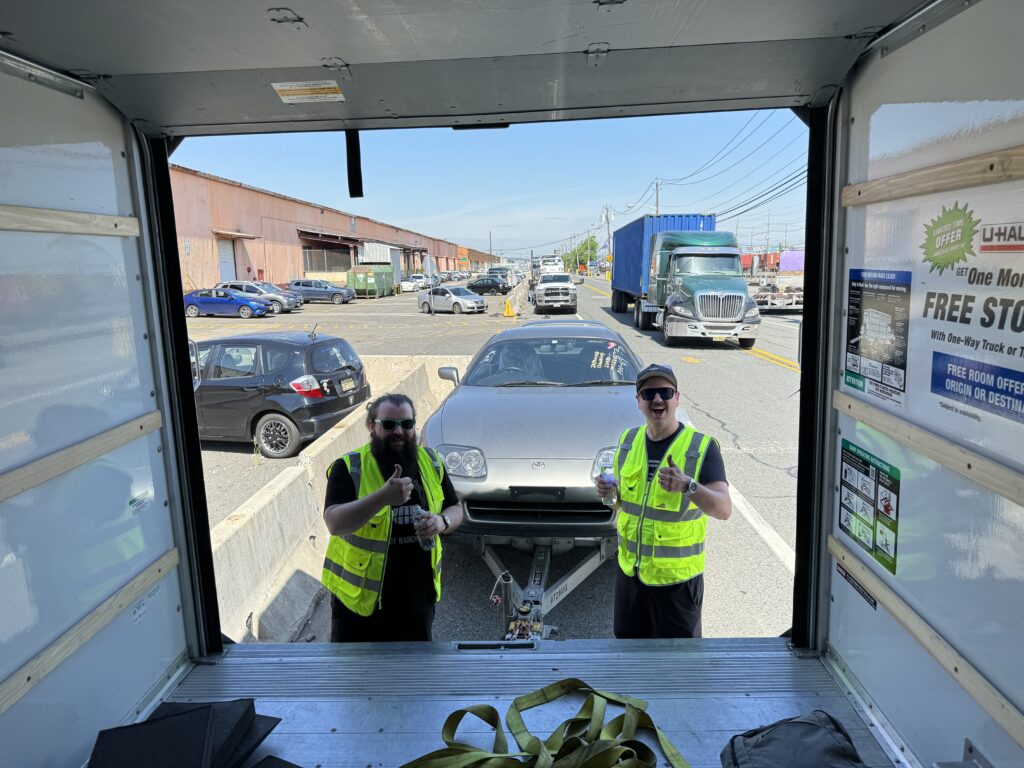
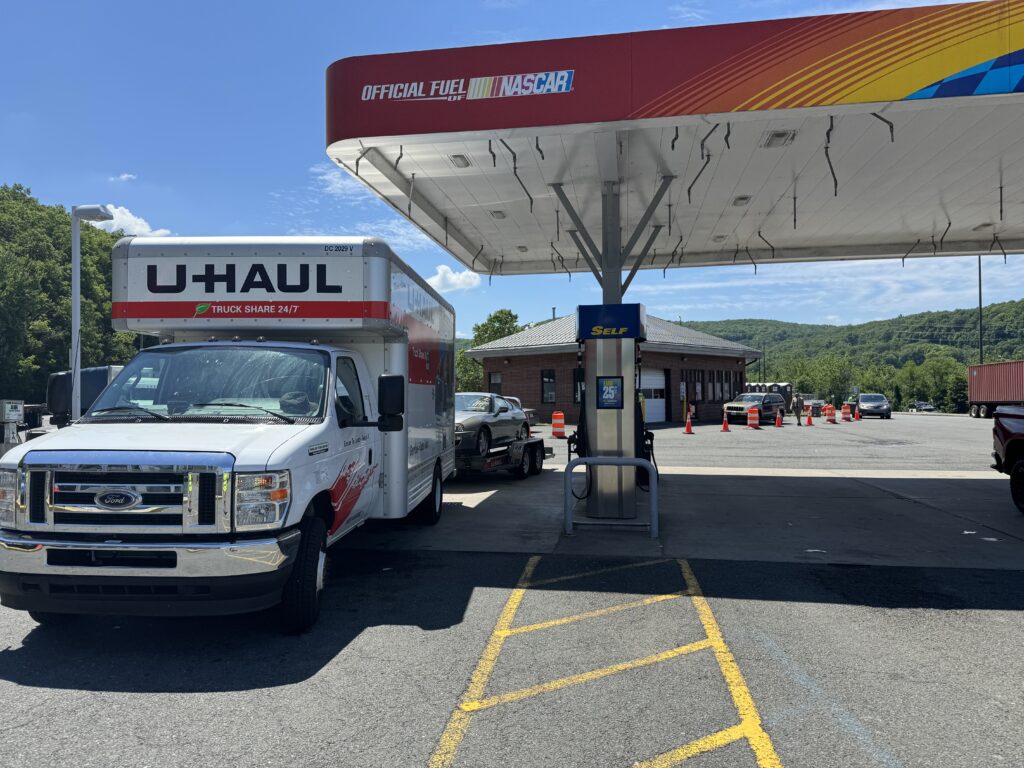
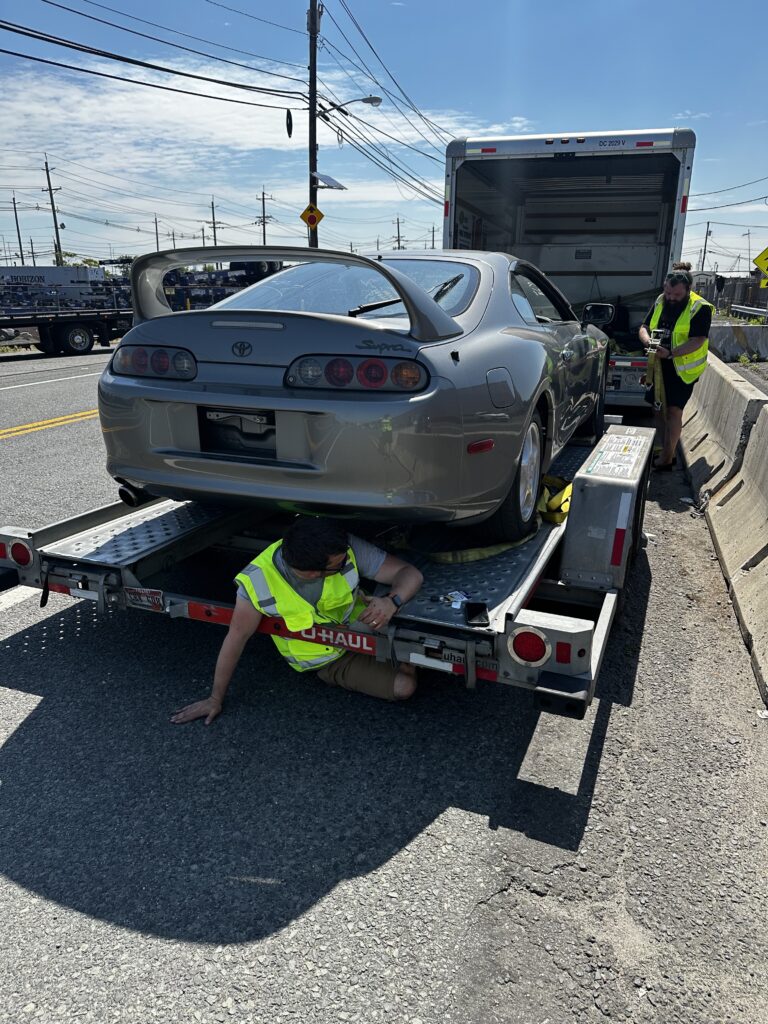
The tow home was actually easier, as the weight of the vehicle loads the trailer up and it doesn’t bounce around as much. Stop and check the straps every 50-100 miles for safety, and you should be good to go.
My Advice
- Bring a Friend
- Bring all sorts of wood and ramps in case vehicle is lower than trailer
- Bring all required Tow Equipment (Tie Downs, rope, etc.)
- Bring a Jump Pack
- The cars are left with the keys in them for transport. The batteries are very dead.
- Bring an Air Pump
- Bring Safety Vests
- Some Ports require these, they’re cheap on amazon
- Bring a Basic Tool Set
- Bring Every Piece of Paper Work You’ve Received so Far
- Do not lose the Export Certificate, Translation, or Bill of Lading
- Bring Cash and Checks in Case you Miss a Fee
- Bring Snacks
- Use Google Maps to Plan Each Gas Stop at a Pull Through Gas Station
- Use Google Earth to Plan a Stay with Space for a Truck/Trailer
- Take Deep Breaths
Step 7 – Title and Registration
Each State is different, I can only speak to my New Hampshire Title and Registration Process – but my understanding is most states are similar.
You will need to bring the following to a Town Hall (not DMV, they want nothing to do with it):
- Commercial Invoice
- Original Export Certificate
- Original Certified English Translation of the Export Certificate
- Entry Summary
- DOT HS7 Form
The process might be sped up if you also write out the following:
- Kilometers Translated to Miles
- GVW
- Cost New (Use Google for this)
- Cylinders
- Fuel Type
- Weight
My town hall was super helpful, and were able to handle this request immediately.
That was the whole Japanese, with every piece of paperwork I filed, printed, and used along the way! This was literally from the auction floor in Japan to my Garage in New Hampshire.
I hope this helps, please feel free to leave feedback and checkout my video covering the process!